
티스토리 뷰
이 글은 mac에서 mysql 설치가 되어있지 않고, brew가 설치되어 있다는 가정하에 작성하는 글이다.
MySQL 설치
1. brew로 mysql 설치하기
아래 명령어를 입력후 mysql 설치를 시작한다. 내 mac에선 설치되기까지 10~15분 정도 걸린것 같다.
brew install mysql
2. mysql 실행
설치가 다 되었다면 아래 명령어로 mysql을 실행해보자.
brew services start mysql
==> Successfully started `mysql` (label: homebrew.mxcl.mysql)
3. mysql password 설정
아래 명령어로 mysql 비밀번호 설정을 해보자.
mysql_secure_installationmysql_secure_installation을 입력하면 각종 비밀번호 설정 옵션이 나온다. 난 처음 질문은 N을 입력했고, 나머지는 전부 Y을 입력했다.
첫번째로, VALIDATE PASSWORD PLUGI 옵션은 비밀번호 길이, 문자 종류(소문자, 대문자, 특수문자 등등..)의 정책을 강화하는 옵션이다. 난 mysql을 로컬에서 테스트용으로 사용할 것이므로 N 을 입력했다.
# 1. VALIDATE PASSWORD PLUGI : 비밀번호 보안 기준 강화, N 입력

Securing the MySQL server deployment.

Connecting to MySQL using a blank password.

VALIDATE PASSWORD COMPONENT can be used to test passwords
and improve security. It checks the strength of password
and allows the users to set only those passwords which are
secure enough. Would you like to setup VALIDATE PASSWORD component?

Press y|Y for Yes, any other key for No: N
두번째로, 사용할 비밀번호를 입력하자.
New password:

Re-enter new password:
세번째로, 익명 사용자 제거를 위해 Y을 입력했다. mysql을 설치하면 기본적으로 익명 사용자도 같이 설치되는데, 익명 사용자는 사용자 계정을 만들지 않아도 mysql에 로그인이 가능한 설정으로 보안을 위해 제거해주는 것이 좋다.
# 익명 사용자 제거 , Y 입력

By default, a MySQL installation has an anonymous user,
allowing anyone to log into MySQL without having to have
a user account created for them. This is intended only for
testing, and to make the installation go a bit smoother.
You should remove them before moving into a production
environment.

Remove anonymous users? (Press y|Y for Yes, any other key for No) : Y
네번째로, mysql에서 최고 권한을 가지는 root 사용자가 localhost에서만 로그인하도록 설정하는 옵션이다. 보안을 위해 root 사용자가 원격에서 mysql 서버에 접근할 수 없도록 Y을 입력했다.
# root 사용자 원격 로그인 설정,  y 입력

Normally, root should only be allowed to connect from
'localhost'. This ensures that someone cannot guess at
the root password from the network.

Disallow root login remotely? (Press y|Y for Yes, any other key for No) : Y
다섯번째로, mysql 설치시 기본적으로 설치되는 test 계정의 접근 권한을 삭제할 것인지 묻는다. test 계정은 누구나 접근할 수 있기에 이 권한을 제거하는게 안전하다. y 를 눌러 권한 삭제를 눌러줬다.
# test 권한 삭제, y 입력

By default, MySQL comes with a database named 'test' that
anyone can access. This is also intended only for testing,
and should be removed before moving into a production
environment.


Remove test database and access to it? (Press y|Y for Yes, any other key for No) :y
마지막으로, mysql 에서 권한 테이블을 즉시 재실행 할 것을 묻는다. 여기서 y를 눌러야 위에 설정했던 권한 옵션들이 적용된다.
# 권한 적용 여부, y 입력

Reloading the privilege tables will ensure that all changes
made so far will take effect immediately.

Reload privilege tables now? (Press y|Y for Yes, any other key for No) :y
4. mysql 접속
mysql에 접속한 뒤 간단한 쿼리문을 입력해보자. 내 mac에서 데이터 디렉토리가 잘 반환되면 mysql은 설치가 잘 된 것이다.
mysql -u root -p
Enter password:
mysql -u root -p
Enter password:
Welcome to the MySQL monitor. Commands end with ; or \g.
Your MySQL connection id is 10
Server version: 8.3.0 Homebrew
Copyright (c) 2000, 2024, Oracle and/or its affiliates.
Oracle is a registered trademark of Oracle Corporation and/or its
affiliates. Other names may be trademarks of their respective
owners.
Type 'help;' or '\h' for help. Type '\c' to clear the current input statement.
mysql> SELECT @@datadir;
+-----------------------+
| @@datadir |
+-----------------------+
| /usr/local/var/mysql/ |
+-----------------------+
1 row in set (0.00 sec)
MySQL Workbench 설치
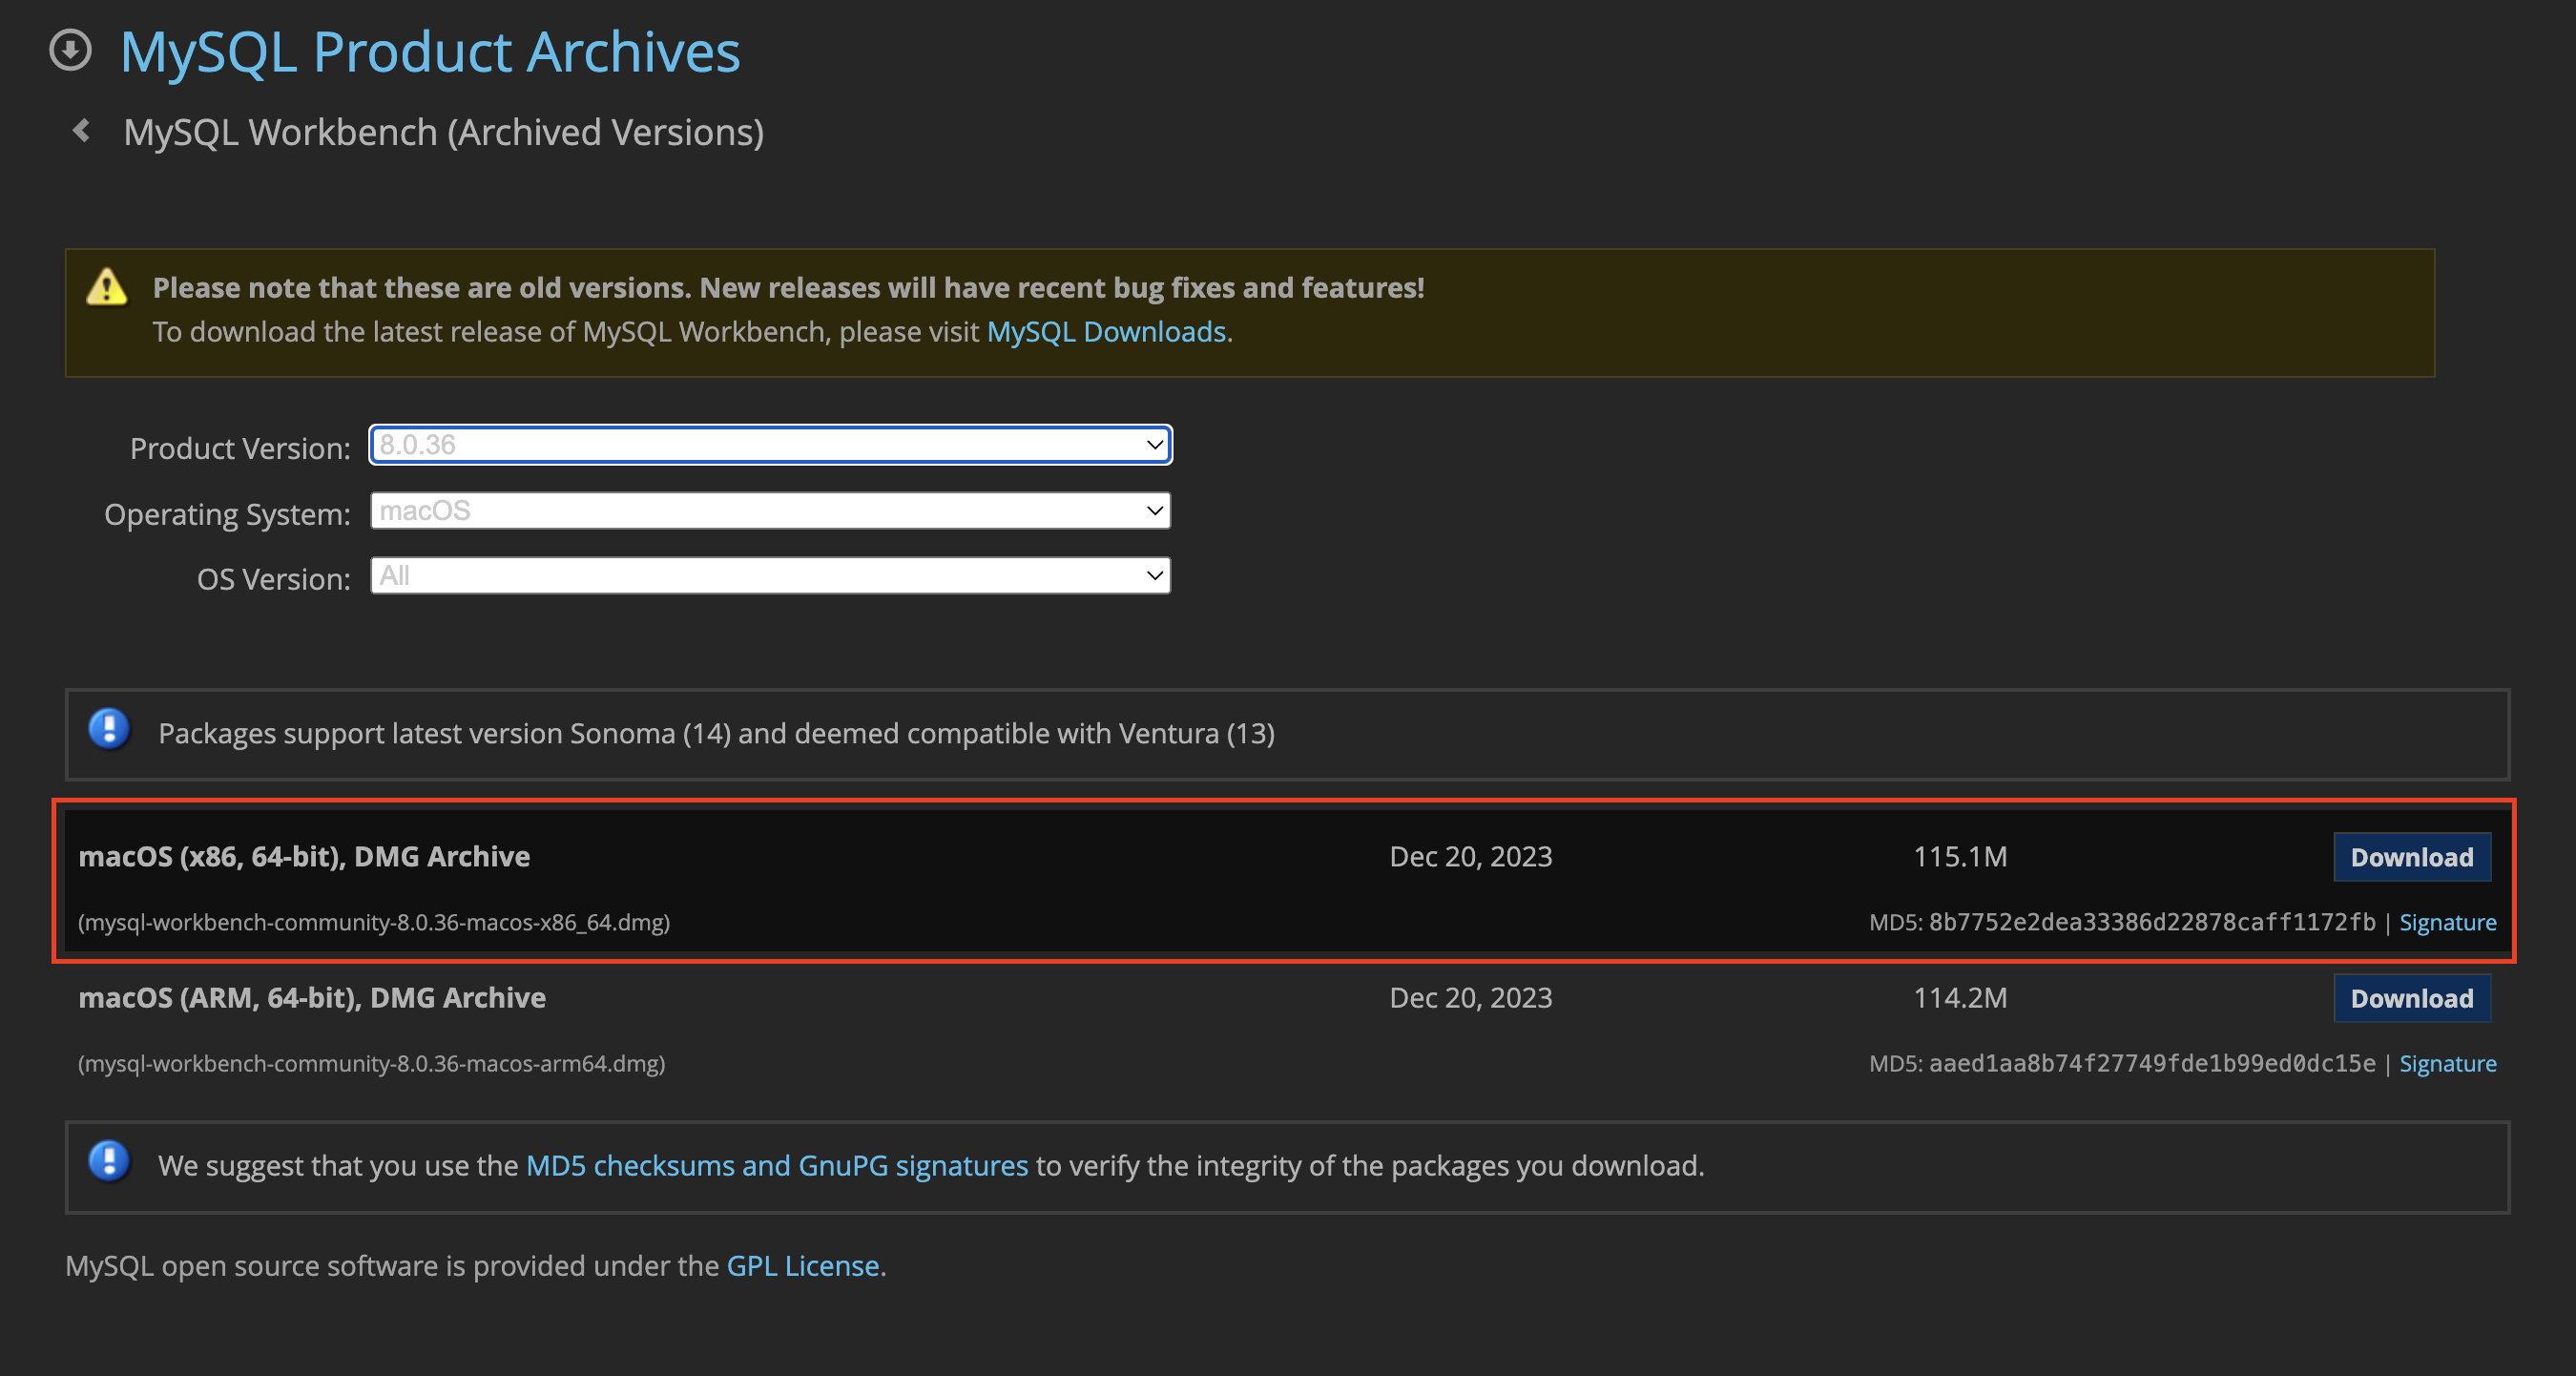
1. mysql Workbench 사이트 접속
아래 사이트에 접속 후, mac의 버전을 확인 후 최신 버전의 mysql Workbench를 설치하자
MySQL :: Download MySQL Workbench (Archived Versions)
Please note that these are old versions. New releases will have recent bug fixes and features! To download the latest release of MySQL Workbench, please visit MySQL Downloads. MySQL open source software is provided under the GPL License.
downloads.mysql.com
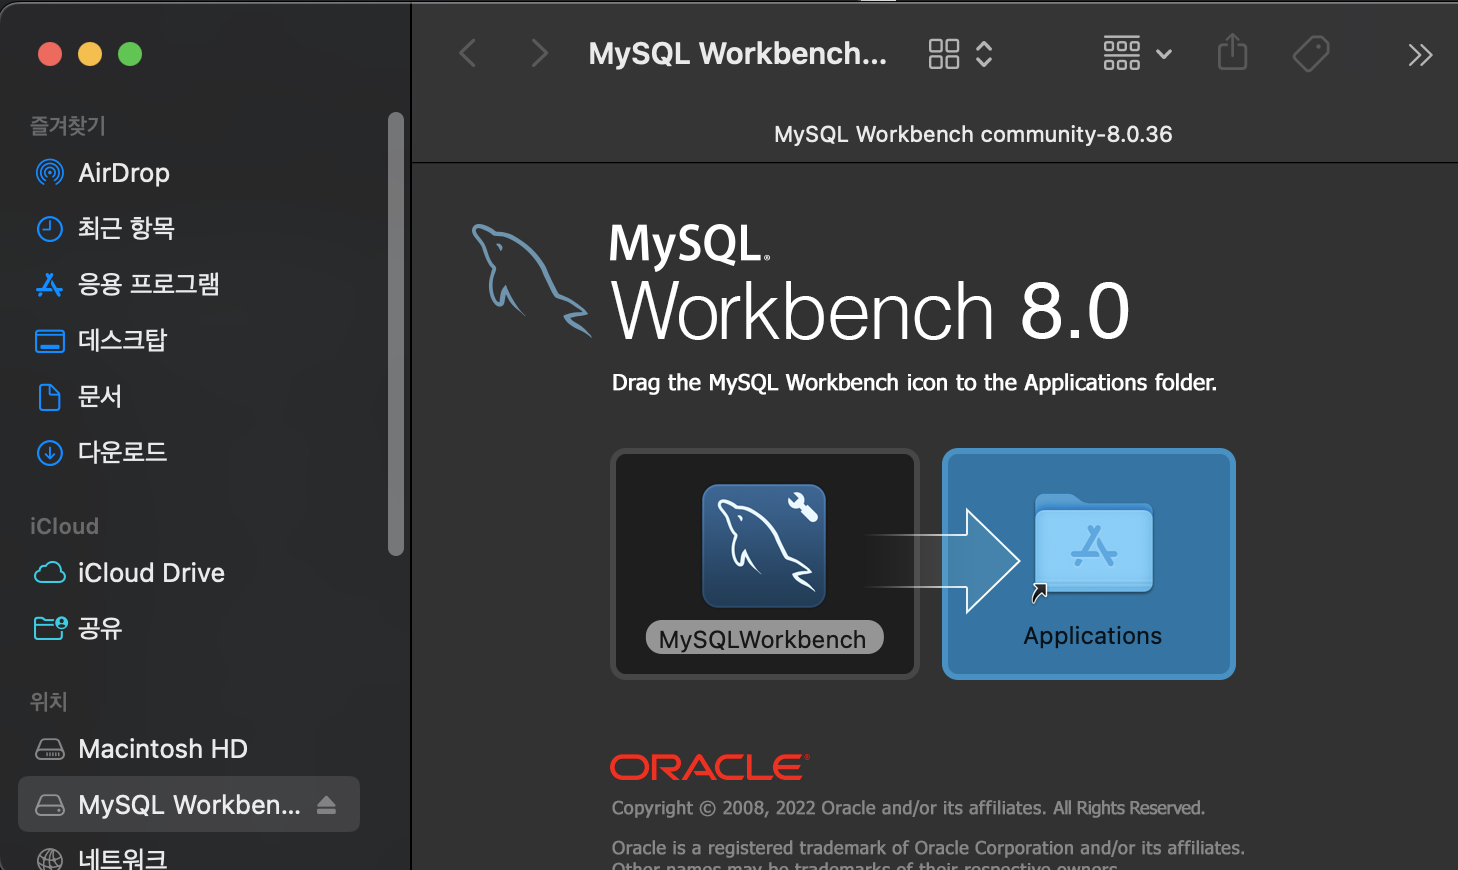
2. 설치
MySQL workbench를 application 으로 이동시켜 준다.
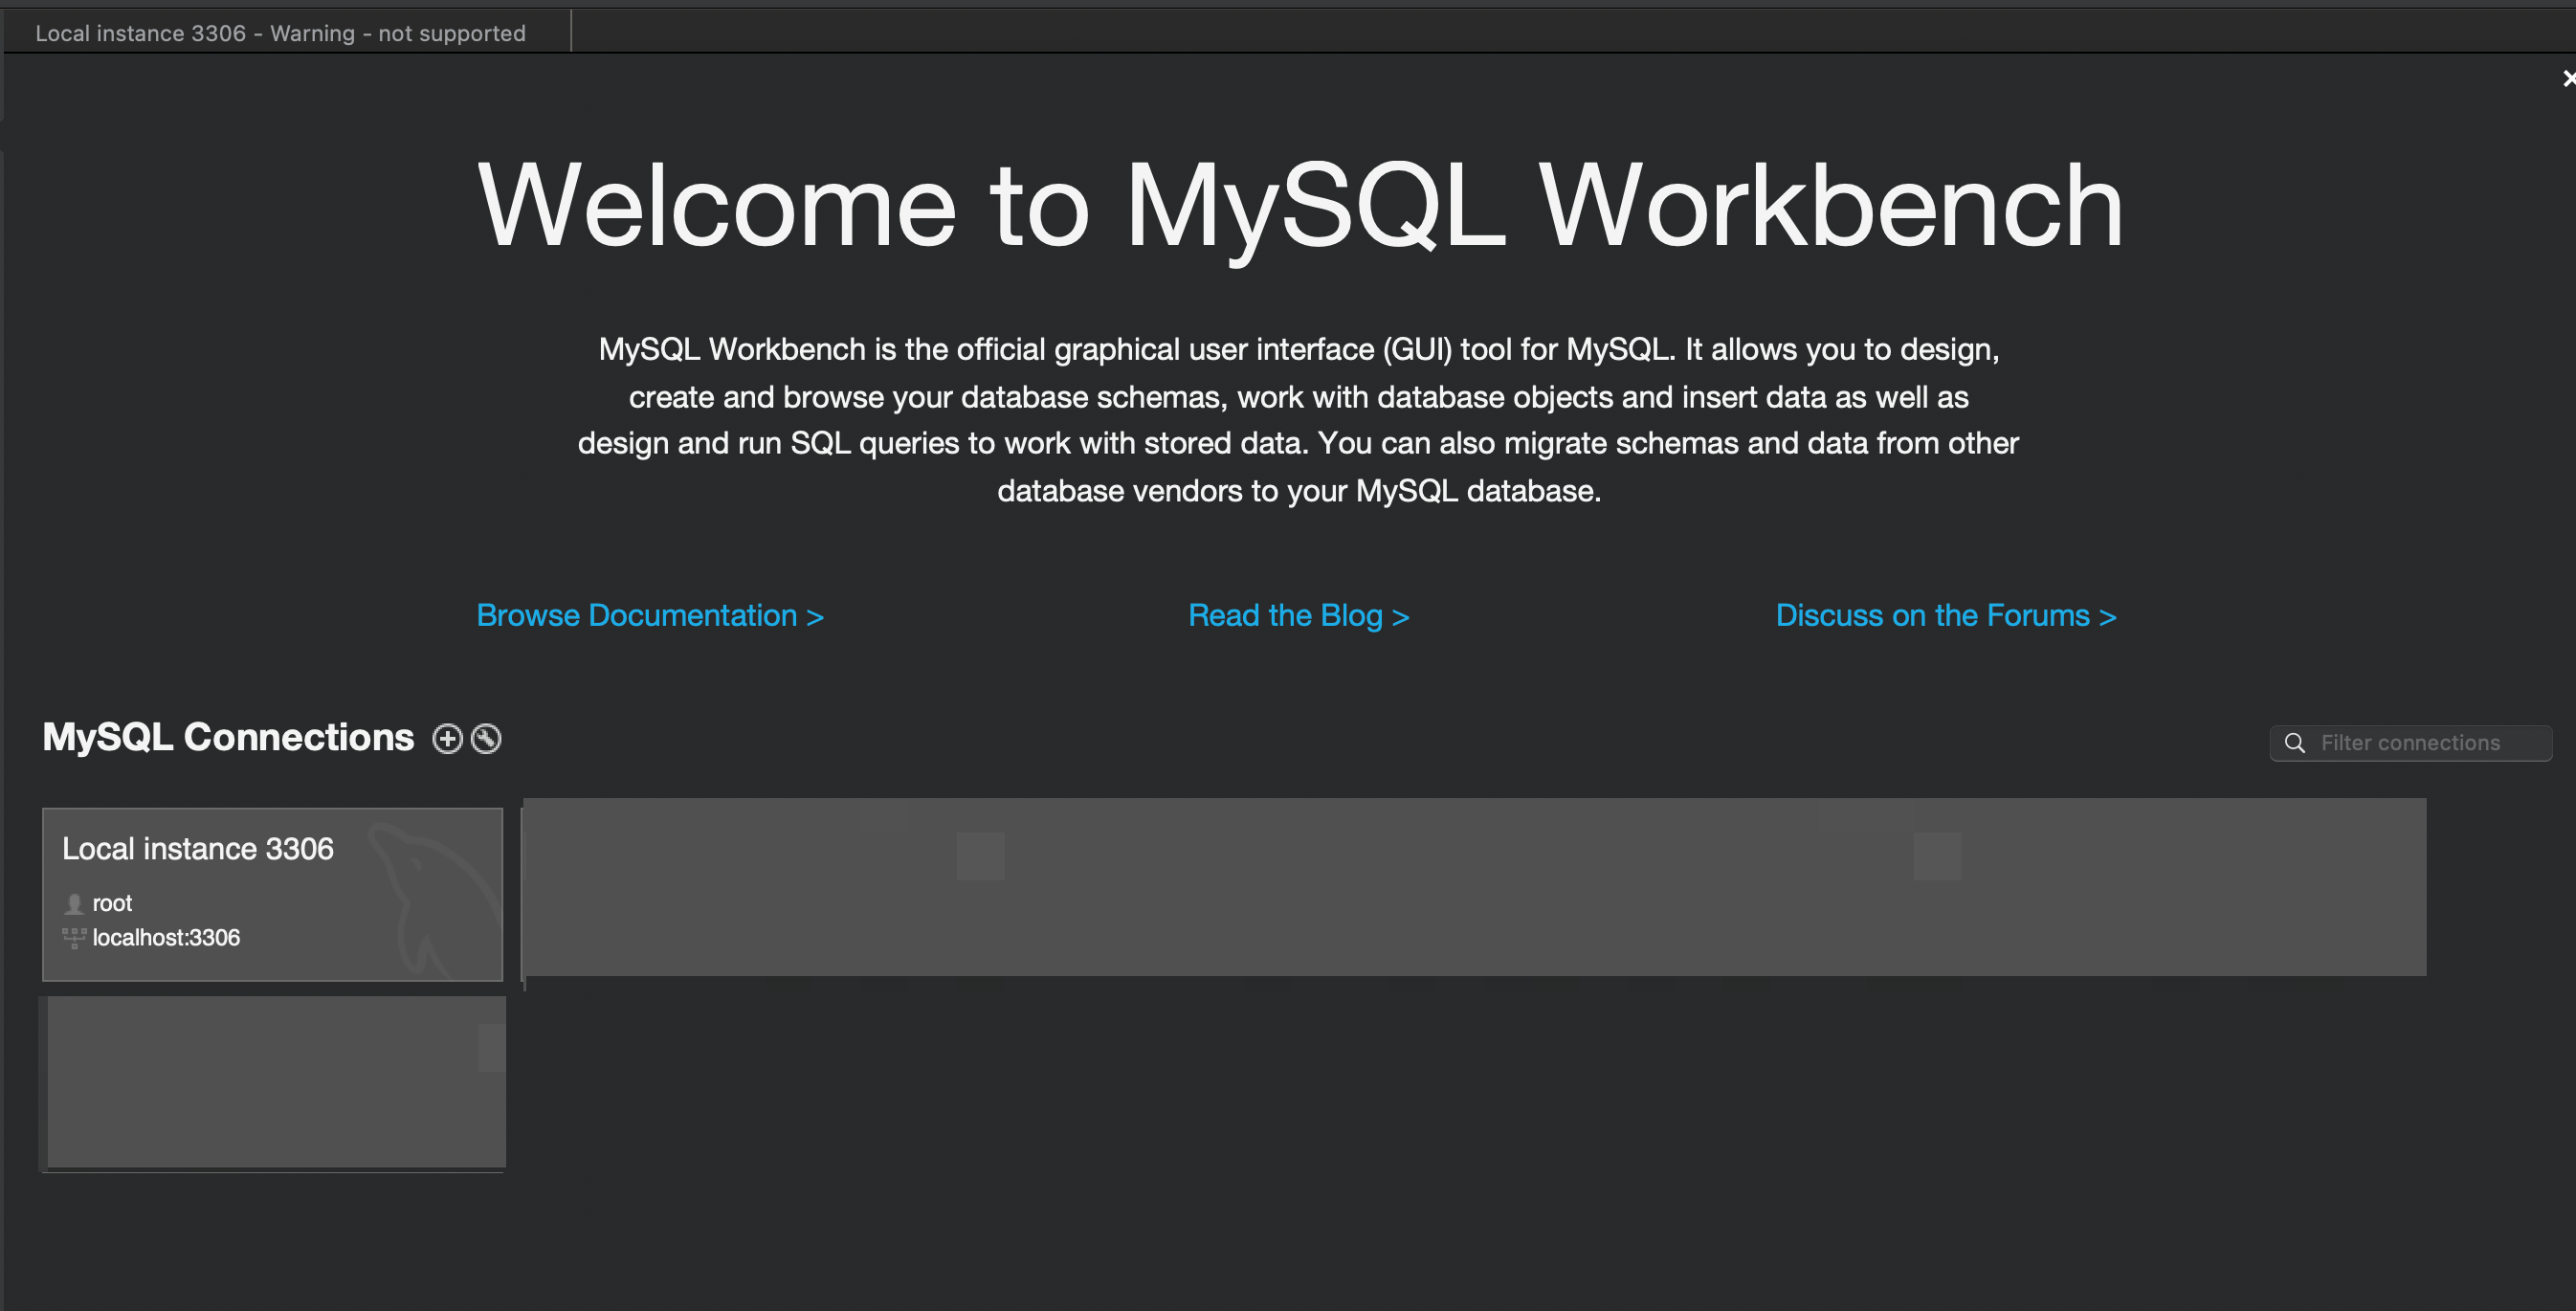
3. 접속 테스트
workbench를 실행시킨 후, 위에서 설정한 mysql password를 입력 후 접속해보자.
'Database > MySql' 카테고리의 다른 글
| [MySQL] ERROR 1049 (42000): (conn=29) Unknown database ‘databasename’ 해결 방법 (0) | 2022.08.26 |
|---|---|
| [MySQL] MySQL 버전확인, MySQL Workbench 버전 확인 (0) | 2022.08.24 |